Showing posts with label free project. Show all posts

Friday, March 10, 2017

A quick bookish project

So, playing with my beading supplies, and ways to use the odd bits of leftover ribbon I've got stashed, and found this idea online.  There are tons of variations, of course, as simple as it is.  Searching on Etsy provides multiple ideas, as well as searches on Pinterest or in the blogosphere.  Flamingo Toes, for example, is a crafting inspiration favorite of mine (and has more than one version, as you see), but there are tons of others too.  Everyday Beauty by Andrea Singarella , Adventures of a DIY Mom, A Creative Life by Debbie Saenz, Rings & Things, Shelterness, Country Living, Intimate Weddings... the list goes on.  Oh, not all those are instruction sites - some are just finished projects or photos of things available in their shops.  Still, as simple a project as this is, that's really enough.

Crafts

The instructions can be found on several of those websites, or at least variations thereof.  A lot of the variation comes in the attachment of the beads to the ribbon - are beads on both ends of the ribbon?  Are they attached by crimp bead or by larkshead knot or sewn into a fold in the ribbon?  More personalization can be added by the ribbon and bead choices.  Fancier ones use velvet ribbons and sparkly beads or old jewelry findings.  I used what I had in my stash :)

Beading   Crafts

So what did I do?
  1. Start with a length of ribbon that is longer than the book(s) you would be using it with.  I just used the lengths I had left on some of these (I was stash-busting after all).
  2. Add a ribbon clamp to each end.  Ribbon clamps can be found at jewelry or craft supply stores, or just big-box stores.  They come in different widths, usually corresponding to standard ribbon widths.  I think I got a multi-size pack from Wal-Mart, so it doesn't have to be fancy if you don't want it to be.
  3. Add beads to the loop on the ribbon clamp.  These are just attached on head pins, like I attach dangles to my stitch markers.
Beading

And, ta-da!  All done and in use!
 
Beading

Wednesday, December 23, 2015

Oh So Pinteresting Wednesday - More birdseed feeders

Following up on a post waaaaaaay back in November 2011, here is another style of bird feeder I've found on Pinterest - Bird Seed Ornaments.  Some call them Bird Seed Cakes, but since you can make them in cute shapes using tins and trays and cookie cutters to decorate your outside trees, and it is the holiday season after all, I'll stick with calling them Ornaments.  Of course, we don't have too many outside trees ourselves, but I'm sure I'll find places to hang them!

how pinteresting

Bird Seed Ornaments

Variation 1:  The first recipe for these that I found was from Critter Comforts, and is as follows.

What you need:
  • 3/4 c flour
  • 1/2 c water
  • 1 pkg unflavored gelatin
  • 3 T corn syrup
  • Bird seed
Directions

1.     Mix the first four ingredients.  Then mix in bird seed, about 4 cups.

birdseed cakes mix

2.     Stir the mixture together.  For extra-messy fun, use your hands.  Beware, though, the corn syrup and the gelatin make it pretty sticky!  Fun for kids, though :)

3.     Scoop the mixture into the shape of your choice. Silicone molds and cookie cutters work beautifully. 

4.     Press the mixture in firmly and layer a loop of twine or ribbon in the middle for hanging.

birdseed cakes drying  birdseed cakes drying

5.     Let the ornaments air dry in a warm, dry spot in your home for at least full day.

finished birdseed cake!  finished birdseed cakes


Variation Two:  Stephanie Lynn at Under the Table and Dreaming has a variation as well.

Compared to the recipe above, this version doesn't use corn syrup or flour - nothing but the unflavored gelatin (and water to prepare it) and birdseed.  And of course, the molds or cookie cutters, and the ribbon or twine to hang them.

Directions:
  1. Begin by mixing two envelopes of Knox Gelatin (approximately 4 tablespoons) to 1 cup of water.  If you're making a bigger mold, you made need to double or triple the recipe.  Obviously you need more seed mix to fill bundt pans or cake tins than you do for cookie cutters or muffin-sized molds.
  2. Simmer on low until the gelatin has completely dissolved.
  3. Add 2 cups of bird seed to the gelatin mixture, stirring until completely mixed.
  4. Spray your mold with a coat of non-stick baking spray and scoop in birdseed mixture pressing lightly to pack down. 
  5. Chill for at least 2 hrs in the fridge.
  6. To remove, turn the mold upside down and apply a little pressure until the bird seed cake is released. For a larger sized mold, you may need to run a butter knife around the edges to help release.
  7. Hang with a ribbon or twine and let the birds enjoy! 


I've only made the first version so far, but I want to experiment (i.e. play!) and see which one is easier, less messy, which one the birds prefer, etc.  Maybe after the new year when I've a little more time on my hands again...

Wednesday, October 29, 2014

Oh So Pinteresting Wednesday: I have joined the ranks of the tutu-ed runners!

There was a Halloween-themed race in our area on Saturday last, with a separate costume contest for the Little Monsters, of course.  The bigger monsters were also encouraged to come in costume - so I did!  I've done other runs in costume, but hadn't done a tutu yet.  But they are getting really popular, so I thought, why not?

The tutu itself is incredibly simple and offers a lot of variation for costumes, theme runs, and similar silliness.  The craziest part?  People will charge $30 or more to make them, when they are SO simple to make yourself!!  So (being the cheap, crafty type that I am) I set about doing some research (Pinterest, of course) and buying some tulle :)

how pinteresting

What you will need:
  • Tulle - you'll need 2-8 yds of tulle.  Comes in tons of colors, as well as shiny and glittered varieties.  I used 2yds each of 3 colors (black, purple, shiny orange).
    • It's an inexact science to figure out how much you need, but rule of thumb: More tulle = Fluffier tutu.
    • You probably want the finer mesh tulle - less scratching as you're running.  But, personal preferences and all that.
    • ALTERNATIVE: tulle ribbon.  These are found in the wedding/floral sections of the craft stores.  Probably need about 4 spools, judging from other instructions I found out on the Internet.  I just used tulle off the bolt - required more cutting, but cheaper and had the colors I wanted.
  •  Ribbon - long enough to go around your waist and tie securely.
    • ALTERNATIVE: elastic.  1/2 to 1 inch wide elastic works just fine.  Don't really want to go narrower than that - you are running in it after all, and want it to be at least a little sturdy. If you're using elastic, you'll also need needle and thread.
  • Scissors 
Halloween Tutu 02 - supplies
What you do next:
1.          Cut your tulle into strips about 4 inches wide.  The strips are attached to the skirt band doubled over, so you'll want the strip lengths to be twice what you want the skirt length to be (i.e., if you want a tutu 9 inches long from the waist, cut 18 inch long strips). 
    • If you are using tulle-on-a-spool, that's easy - it's already at the width you want, so you'll just cut it to the length you want.  Remember - 2x the length of the skirt.
    • If you are using tulle from the bolt, fold the piece of fabric so that it is length you want, and then cut into strips.  
2.          I cut all my strips, and kept them grouped into piles by color.  I held one strip of each color in each bundle that I attached to the ribbon.  Other variations I saw made their skirts striped, so each bundle is one color only, alternating colors around the band.  All in your preference.
Halloween Tutu 03 - tulle in strips
3.          To attach the bundles of tulle, you tie it on using your choice of knots.  Some instructions just tied on the tulle with an overhand knot, but most used the Lark's Head knot (even if they didn't know what it was called).  The Lark's Head is the 'up, over, and pull-through' knot, about as simple a knot as you can get.  Yay for learning this stuff in Girl Scouts!  I'm not going to explain it any more, because there are tons of clearer directions out there with videos and diagrams and all (including in one set of the instructions below), so I'm sure you can find one that is clear to you. 

Halloween Tutu 06 - adding tulle
4.          Since I was doing a no-sew version, I was attaching my tulle to a length of ribbon, long enough to go around my hips and tie.  I started attaching my tulle in the middle of the ribbon and worked out from there, adding bundles on each side.  The more tightly squeezed in your knots are, the more tulle your skirt will have, and the puffier it will be. 

5.         Keep adding tulle until you run out of space or of tulle.  I had ended up not cutting my strips evenly, so I had more orange and black than purple.  I added a few bundles of black and orange (and even just a few orange-only), but they blend right in.  There's so much color and movement in the skirt anyway, that a little unevenness like that won't show :)

6.         Ta-da!  You're done!  Go tie it on and have some fun :)
Other references I used (there are 1,000,001 different instructions for tutus out there; these are a few I looked at for research, in no particular order):
And then the race itself!  

The skirt was the final piece in my costume which also included striped knee-high Halloween socks and a hairband with a tiny witch's hat.  So cute, and only $1 at Target!

IMG_20141024_164932045_HDR  IMG_20141025_085155541

If anyone asks, I chose the ribbon with the apples because witches and poison apples and the whole deal.  But really, it was the first one I grabbed out of my stash that didn't clash completely :)

Thoughts?
  • Fun, ridiculously silly, ridiculously easy - win win win!
  • There are tons of ways to customize these suckers.  As I said above, you can make them striped or color-blocked, depending on how you arrange the colors.  You can add ribbon to add some contrasting color, or use strips of fabric or wide ribbon instead of the tulle to make a different kind of skirt altogether (swishy, rather than poofy).  And just playing with the colors of tulle, there are tons of options: I've seen ones with different holiday color schemes, ones for each of the Disney princesses, red ones with large white spots as part of a Minnie Mouse costume, blue ones with large stars as part of a Wonder Woman costume, lots of pink and purple ones for fairies, green ones for Tinkerbell... the list goes on and on.
  • I don't know if I'd be able to run longer than a 5K in the costume I used on Saturday.  I was pretty pleased with my race time and I like the skirt, but the tulle can get bunched between your legs as you run.  I did have to walk a few moments during the last mile to rearrange my skirt.  In the future, I'd either need to make it shorter, so that it sticks out more than it drapes, or wear running tights - which it was definitely too warm for on Saturday... yay Texas :(
  • All in all, though, a fun project and a fun race!

Friday, July 11, 2014

Fun with Scissors and Spray Paint!

When we first moved out here, Zach had some pretty long days, busy with all sorts of trainings and new duties and whatever.  Which meant I was left home alone to be crafty! That was 3 years ago now, so as kinda an anniversary post, here are some projects that I did soon after we moved here.  Yup, another 'finally writing it up' sort of project :)  I don't really have instructions for these, or step-by-step pictures, though, just a lot of chatter about what I did.  

First up, I finally got around to recovering my pin boards.  I've collected pins for years, as swaps at conferences, or as souvenirs from places I've traveled or events I've participated in.  I've got them from all over, and display them on fabric-covered cork boards.  I started with just one, but have expanded my original single board into a whole wall-full! 

the pins over my computer desk

The picture above (with the blue fabric) is from our place in CA.  After 3 and a half years in a VERY sunny area, even with blinds on the window, the fabric had faded a good bit, especially on the largest board.  So they were due for a rework.  Also, the colors in the room the boards hang in now did NOT match the pastel blue that worked so well before.  Definitely reasons to rework these.

So, first up, I undid the old blue fabric.  The fabric tucks under the frame around the cork, so just needed to be pulled away.  Once the frames were bare, I repainted them a nice satin-finish black.

I used white-on-white patterned fabric to cover the boards.  I have 3 sizes of boards, the small and medium size ones shown with my pins, and the large one with my necklaces shown further down the post here.  All the board frames were repainted with the same black paint, but each size has a different fabric on them.  Not really noticeable in a picture like this, but I like it in person.  I was hoping to find a black-on-white fabric, but the only ones I could find were cow splotches and large damask prints (too busy and too much black for what I want to display) or tiny polka dots (the right size, but if I didn't get the rows lined up just so, I'd have driven myself batty looking at it - yes I am that nit-picky).  So, white-on-white it was!

Pin boards

Yes, I realize that several of the boards have only a handful of pins on them, but they are also divided up by category, to a mild extent.  So, international pins are on one board, academic pins are on another, military pins are a third, Hard Rock Cafe guitars are another, and sports pins are a fifth.  The two bigger ones are the general pins from US travel (also knitting and Scouts, since those also included US places).  They're much more full now than when this picture was taken. We've been out and about!  :) So yes, there is a method to the madness!

The necklace organizer below was recovered at the same time and in the same way as the pin boards - new black paint and new white fabric.  I used it while we were in CA, but had never covered it, just left it as a giant cork board.  It was hanging in the closet after all.  Now that it's in the room instead of closet, I definitely wanted it to look nicer, so paint and fabric it was!  Even covered, though, mine's still pretty basic.  You can see all sorts of pretty ones on Pinterest, though.  Tons of variation!  The lace-covered ones for hanging earrings are really pretty, but as I don't have earrings... 

The accent L on my necklace board is just a little extra I added.  The letter is one of the 99 cent ones from the craft store (Hobby Lobby, I think), with 3 thumbtacks attached to the back.  This lets the letter act as one giant push-pin and I can position it wherever I wanted on the board.  Then the whole letter-pin was painted black to match the frame.  I just use clear push pins to hang my necklaces on the board.  So much neater than necklaces forming tangles in my jewelry box!


necklace board 

So, yeah, not too much in this post, just me being proud of my painting skills and (tiny) organizing efforts. And hey, 3 years in TX now - less than 3 to go!

Tuesday, August 13, 2013

Wordle!

So, Wordle is a (free!) website where you can make your own word-art picture-things.  They call them 'word clouds.'  I call them geeky fun! 

With starting up grad school soon (less that a week!!), I've been looking at planners and how to balance classwork and work and chores and workouts... you know, juggling life.  At the moment, Life is balanced between several notebooks - my main planner, my food journal and my workout journal (still trying to get those last stubborn pounds!), and a small notebook for notes, to-do lists, positive thoughts, etc.  I record a lot on my Google Calendar too, since that syncs to my phone very well, and I love being able to turn on and off the different layers in my calendars, but my phone won't cover everything I want my "paper brain" to do.  I do record a lot of my workouts via my phone, but I'm not crazy about the food journaling apps I've found (including WeightWatchers, even though I love their online site).  Just not as user-friendly for me.  And I've yet to find a good to-do list app that would act as my homework checklist, chores checklist, etc.  I like Evernote, but it's not quite as editing-friendly as I'd like.  I use it a lot, but for other things.  The daily jotting-down of lists really does end up on paper a lot for me, which is fine. I just want it to be all in one notebook, not in three smaller ones.  

After a lot of playing around in Word and Excel (not a Photoshop guru, to make a pretty, fancy set-up), I designed both monthly pages and daily pages that I liked.  There are places for my meals (food journal), my exercises, my daily agenda, things to remember looking ahead, homework or planned school reading, daily chores...  Yes, I'm in a highly dorky, happy place :) 

nerd girl - office supplies photo

And before you even ask, yes I love my office supplies;  the above Nerd Girl Quirk is pretty accurate (this one's #111, though the number was cut off).  And since I've already found my perfect ball point pen (Pentel RSVP, if you are interested), I'm working on my perfect planner!

So, what does that have to do with Wordle?  Well, the new planner needed new dividers, so I designed "word clouds" to be the focus of each monthly divider.  Because I can!  The more your repeat a word, the larger is it in the word cloud, so the month on each page is repeated 15-20 times (depending on how many other words I was using), then the more major holidays or attributes of the month (ex, "spring" in April) were repeated 3-6 times, and minor descriptors, characteristics, associated words, and random holidays were repeated just 1-2 times.

Wordle: January Wordle: February Wordle: March Wordle: April
Wordle: May Wordle: June Wordle: July Wordle: August
Wordle: September Wordle: October Wordle: November Wordle: December

For this set here, the font is Berylium.  I adjusted the color palettes to match the calendar pages I'd designed (which in turn, had their color schemes determined by the word art I was using as their headers, found on a free calendar online).  If you're playing with the colors, there's plenty of options, and just keep clicking Recolor until you find one that you like.  The format is Half-and-Half on most of these.

I also made one with my name and words about me (hobbies; places I've lived; stuff I love, etc) for the cover page in my planner, but since that one's pretty personalized, I'm just going to leave it up to your imagination.

Oh, and if you like playing with these, there are others like Wordle.  Tagxedo is one that lets you make shapes too (or rather, fill in pre-designed shapes).  These are pretty, but I liked the general cloud from Wordle better.  I found these two through Pinterest, but you can find some others if you search a little.

And as a final nerdy note on this post, when I was looking for the above Nerd Girl, she also has a Nerd Girl Quirk for Wordles, #215, which I didn't find until I was in the midst of writing this post :)

Wednesday, July 10, 2013

Pinteresting Wednesdays - bamboo placemat vases

OK, this one might be cheating a little.  Well, stretching the definition of Pinteresting juuuuuuust a little.  Yes, this project is currently on Pinterest, and pinned on my Craft Ideas board, but I was the one who added it :)  Still, the original website where I found it, Dollar Store Crafts, was one I discovered through Pinterest.  The website I pinned was the full instructions for this project at In This Life.  So, in a round-about way, I think this still counts as a Pinteresting Project!

how pinteresting 

I did make some changes as compared to the inspiration project, but it's definitely still the same idea, just tailored to my own decor and tastes.  Here's what I used:
  • Glassware of assorted heights.  I didn't use the sugar shakers, but two vases and a drinking glass.  The Dollar Trees in my area didn't have multiple sizes of sugar shakers, so to make an assortment of heights, I turned to other glassware to suit my needs.
  • Two plain bamboo placemats.  I liked the colored ones in the inspiration piece, but the colors don't match anything in our house.  The plain placemats were slightly more expensive, not being at the Dollar Tree but at the commissary, but they were still only about $1.25.  Not too big a difference.
  • The third placemat came from Target (I believe) and is a black and natural striped pattern.  Still not a Dollar Tree placemat, but also still only about $1
  • Scissors
  • Hot glue
  • Paint - black
What next?

I really followed the directions as given this time!  *gasp*  I know!  That's kinda unusual for me with my knitting and craftiness.  As I stated above, the website with the full instructions and lots of pictures is In This Life.  I'm just summarizing here and noting the few changes I made.
  1. Make sure the glassware is clean and dry.  Set aside the tops, if using sugar shakers. I was using vases, so didn't have to worry.
  2. If you are doing anything to the mats decorating-wise, do it before you start cutting and hot-gluing.  Painting over hot glue can get messy.  I painted two of my mats plain black using just basic craft-store acrylic paint and a foam brush.  Make sure they are completely dry before continuing on.
  3. Trim a mat to the height of one of the glasses.  The easiest way to do this is to score the placemat first with a craft knife, and then cut it with scissors.
  4. Wrap the trimmed mat around the glasses.  
  5. Cut the mat to just fit around the shaker.
  6. Be sure to secure the end pieces of the mat immediately with hot glue in a couple of places, especially at the strings.  This will prevent the mat from falling apart.  Otherwise, the sticks in the placemat will fall away once the strings are cut.  Not a mess you want to deal with!
  7. Carefully hot glue the mat to the glass, wrapping the mat around as you go.  Be careful to keep the bottom of the glass even with the bottom edge of the mat. 
  8. Secure with rubber bands and let dry.  Ta-da!
Repeat these steps with your other glasses, and you'll have a set.  Fill them with whatever you want!

bamboo vase set

All in all, the biggest changes I made to the inspiration piece were what glassware I used for the bases, and painting the plain bamboo mats instead of using the colored ones.  I ended up with 3 vases still, but in patterned black and natural instead of eclectically colored stripes.  Definitely more my taste.

Also, it is easier to paint the placemats a solid color instead of a pattern.  I had originially wanted to paint the middle-sized vase a black and white pattern, but things just kept smudging on the slats.  When I found the striped placemat, it solved my problem perfectly.  So, personal experience, it's much easier to make it a simple paint job than to try and do something involved on the textured surface.

Wednesday, April 3, 2013

Oh So Pinteresting Wednesday: Lip Balm

This Wednesday is a project I've been meaning to try for a while, and am finally getting around to it.

how pinteresting

Homemade lip stuff (gloss, balm, whatever you want to call it).  I am a dry person physically - skin, hair, nails, etc - and living in the desert kinda killed me.  My body just couldn't handle it.  I am not built for the desert!!  Texas is a bit better, but it's still pretty dry where we are.  I'm always looking for good moisturizers that work and don't cost an arm and a leg.  And my new office is pretty dry too, so I figured this would be a good time to try out one of these recipes.
There are BUNCHES of different recipes for this out there, from 2-ingredient versions that would be easy to do with kids, to ones that have a dozen different oils and waxes and moisturizing what-nots.  The ones I've read through are below, in case you want to browse through for your own inspiration.
  • Brilliantly Bland has a Honey Orange Lip Balm recipe, with some great tips on using a double boiler for beeswax.
  • Mountian Rose Herbs gives recipes for three different variations, plus tips on customizing your own favorite.
  • Rustic Escentuals uses much more specialized ingredients in their Swirled Lip Balm Recipe, but I do like the detailed instructions and the swirled pattern idea.
  • Beautylish has a Cool Winter Lip Balm recipe.
  • Instructables provides information about using empty tube containers in their Delicious Chocolate Honey Lip Balm directions.
  • The Camera's Lying's Tinted Lip Balm was the first set of instructions I saw that used lipstick to color the balm. 
  • Torie Jayne gives instructions on coloring with food coloring, as well as other decorations, in her Hand-made Cool Mint Lip Balm instructions.
  • Cheeky Kitchen also plays with coloring and with flavors in her Homemade Kiss Gloss instructions.  I also like the container tips (Bead organizers!  Genius!)
  • Design Sponge gives instructions for a Solid Perfume Pocket Watch Locket.  Yes, she's not making lip balm, but I really liked the idea of the pocket watch as a tin.
  • And what crafty DIY list of links would be complete with a Martha Stewart version?
Now, after all this research, what did I do myself?

lip balm

Ingredients
  • Vaseline with Cocoa Butter
  • Coconut Oil - yup, just regular from-the-kitchen coconut oil
  • Peppermint Essential Oil
  • Lipstick - I had a stick of Clinque Pink Chocolate that I used.  Like the color, but more of a gloss person, rather than a lipstick girl.
  • Small tins - as I am addicted to Altoids, I had an assortment of small mint tins to refill.
lip balm ingredients
  • Double boiler or microwaveable bowl (depending on how much you are making)
  • Spoon
  • Aluminum pie tin
lip balm set-up

Directions
  1. Add 3 heaping T of Vaseline and 4 T coconut oil to small bowl.  
  2. Add lipstick, broken into pieces if possible.  This will help it melt more evenly (Vaseline and coconut oil both melt much more quickly).
  3. Melt in microwave.  I used 60% power and 30-sec bursts, stirring after each one.  I used a plastic spoon to stir the mix.
  4. Mix in several drops of flavoring oil (I used mint, my favorite)
  5. Pour into clean, prepped containers.  I set up mine in the pie tin, to give myself a clean, contained workspace.  I knew I'd spill some, after all, and didn't want it all over the counter.
  6. Let cool.  Some of the recipes above recommended putting them into the refrigerator as they cooled.  I just left them on the counter all afternoon, but I didn't use beeswax either, which does take longer to set.
  7. Enjoy!
lip balm cooling

Overall Comments and Thoughts
  • Let the rest of your household know what's cooling in the kitchen.  I came down to check on them, and found a fingerprint in one of the tins.  Zach was curious as to what I'd been making :)
  • I like the small tins to hold them, but don't like the big Altoids logo.  Thus, my tins sport a coat of nail polish to make them a little more decorative.  Also to keep me from getting my lip balm confused with my mints when reaching into my purse!
  • I like the soft balm that I made (I've often used just plain Vaseline to help my lips when they get really dry) but I'm curious about some of the other variations.  I think I might try a honey-beeswax version when I make my next batch in several months.
  • I know the picture on the right is a little blurry, but it best shows the color of the lid.  Which is a nail polish I really like :)
lip balm  lip balm

Wednesday, February 20, 2013

Oh So Pinteresting - Dirty Dishes

This Wednesday I'm bragging about a project from a while ago, but one that's still used all the time and I'm still very proud of.

how pinteresting

When I first discovered Pinterest, one of my first projects was making some pretty drink coasters.  I've made additional batches of them from time to time, using seasonal ribbon to make them festive (yay for the Target $1 bins!)

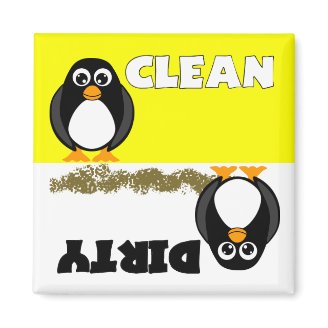
As I was playing with the coasters, I also took one of the painted ones to make a dishwasher magnet.  You know, one of those clean/dirty magnets.  The dishwasher in our new house doesn't have a little light when the cycle's done, so it's a little harder to tell at a glance when things are clean.  As compared to our old one, at least.  This is the solution, a project in the Efforts to Organize Myself category.

There are dozens of ideas for this sort of thing on Pinterest.  I liked the penguin one (sorry I don't have a better link) and the Scrabble tile one was pretty neat.  The Christina Aguilera one (No. 19) was just plain funny, but the joke would get old day after day.  And I don't like the Americana or country kitchen or shabby chic color schemes.  Nothing against those decorating schemes, just not my personal taste.  So, none were strong favorites.  Thus, I had to come up with my own.

As I said, I took one of the painted coasters to use as the base for my magnet.  I used two different fonts of sticker letters from my scrapbooking stash.  The magnets were sorta from my stash too - I'd been keeping those free business card magnets that come with the newspaper or phonebook or whatever, actually for projects just like this (they're stored in the King Leo Peppermint tin in the picture below).  So, really a nice cheap project too!  Always a plus :)  

magnet parts

Back to the stickers... I used two different white fonts to write out Clean and Dirty.  I chose drastically different fonts, so that it'd be easy to tell at a glance.  Remember, they are upside-down to each other, so that the magnet can rotate and still be legible.

I wanted to keep it all black and white, so the last decorations were simply a few white swirls.  The swirls were made by using a nail polish pen, the type used for French manicures and decorative manicures.  I used the polish pen, as I didn't have other white paint, and it was both opaque and easy to draw with.  You can use whatever you want to decorate, obviously. .

Everything was decoupaged in place, and then a few coats of Mod Podge over the top too, to make sure the stickers will stay very put.  The front was finished with a few coats of clear spray paint, for the moisture resistance.

The magnets were glued to the back with Superglue.  The hot glue didn't take as well to the covering on the magnet business cards, too shiny I guess, but the Superglue did the trick.  Make sure you attach enough magnets to keep the coaster up; if your coaster's a heavier one, you might need more magnetic material on the back to keep it from sliding off your washer.

Ta-da!  All done!

2011-09-18_21-15-17_133

And here it is in use!

clean/dirty

Tuesday, February 19, 2013

Another Downton-related post!

And yes, this is the weakest of connections, but I still wanted to include it.  I had fun playing with some new knitting accessories recently, and since I used them for the first time on the Downton KAL, I feel that I can include it all together.  Besides, it's my blog.  I'll post what I want :)

First up, some new stitch markers.  One set of lobster claw ones (the watermelons) and one set of beaded drops (the purple and orange - surprisingly cute $1 beads from Wal-Mart!).  Nothing much more to say, really.  I just wanted to show them off  :)

watermelon markers  purple & orange stitchmarkers

The other new stitch markers are simple rings.  I found a bag of assorted colored jump rings at a big box-type craft store (Michael's or Hobby Lobby, can't remember which).  Too much fun to pass up.  So, using simple silver beads (most of them are spacer beads), I made a sizable number of simple larger stitch markers.  Just opened the rings and added the silver accent over the opening. They are light and pretty snagless, both very important when working with any knitting, but especially when using the larger needles that these fit.  You definitely want lightweight stitch markers on projects like that!  And c'mon - hot pink!

ringmarkers  ringmarkers

The last new accessory is a new knitting bag set.  These are clearance too, for a bonus. I got the idea during the yarn crawl back in October.  I noticed a lot of very cute small project bags, and started making mental notes.  I didn't want to pay $25 for a basic drawstring bag, after all.  One style that I noticed added a grommet hole to their bags, to pass the yarn through.  YarnPop is the brand I saw, but upon looking for their website, I also found other brands and etsy sellers who used the same idea.  You pass the yarn through the opening, so that the skein stays in the bag, nice and clean, while you work on the project outside of the bag.  Helps keep the yarn clean, the skein from unraveling like crazy all over the place, and other nice perks.  I really liked the idea, but as I mentioned, paying $20 and up for a drawstring bag with a grommet just seemed excessive.

I had leftover grommets from adding one to my wallet (where I clip my carabiner with my keys).  Those grommets come in large packs, lemme tell you!  I needed one for my wallet, but they come in packs of about a dozen!  So, I had plenty to experiment with in creating a project bag.  All I needed was the cute bag! 

I found the bag I liked at Old Navy.  A clearance lunch bag, as a matter of fact.  $2.50!  So much easier on the wallet than $25.  Yes, it is a Velcro closure, but it's easy to feed the yarn through so that the Velcro won't catch.  And as a special plus?  There was a pencil case in matching material!  Can we say notions pouch?

my own knitting set, supplies

To make my lunch bag into a project pouch, I added two grommet holes near the top, between the Velcro squares. The yarn can be fed through very easily, and if the grommets are installed properly (follow the directions on the package!), then the holes are pretty snag-free.  When you load everything back into bag, the flap of the lunch bag protects the yarn coming from the grommet and passing back into the bag.  Ta-da -  everything stays nice and neat!

grommets in new bag

So, there you go! A very simple alternative to fancy-shmancy store-bought bags.  To summarize:
  1. Find a bag you like.
  2. Purchase a set of grommets (or use some from your craft stash).  You can find these at most big-box craft or sewing stores.
  3. Mark where you want your yarn holes to be.  You don't want them too close to any Velcro or zippers on the bag, to cut down on any snagging.  Also, it's nice to have the yarn protected when you're not using it, there there are any flaps to take advantage of.
  4. Cut the bag at the marks, if necessary, to start the hole.  You probably will, if there's much thickness to the material - the grommets just don't punch through thick materials.
  5. Follow the directions to install the grommets.  Hammer, hard surface, etc.  Nothing too complicated.
  6. Enjoy!