Wednesday, February 20, 2013

Oh So Pinteresting - Dirty Dishes

This Wednesday I'm bragging about a project from a while ago, but one that's still used all the time and I'm still very proud of.

how pinteresting

When I first discovered Pinterest, one of my first projects was making some pretty drink coasters.  I've made additional batches of them from time to time, using seasonal ribbon to make them festive (yay for the Target $1 bins!)

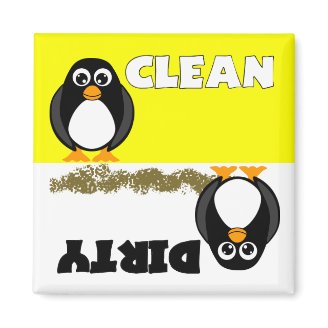
As I was playing with the coasters, I also took one of the painted ones to make a dishwasher magnet.  You know, one of those clean/dirty magnets.  The dishwasher in our new house doesn't have a little light when the cycle's done, so it's a little harder to tell at a glance when things are clean.  As compared to our old one, at least.  This is the solution, a project in the Efforts to Organize Myself category.

There are dozens of ideas for this sort of thing on Pinterest.  I liked the penguin one (sorry I don't have a better link) and the Scrabble tile one was pretty neat.  The Christina Aguilera one (No. 19) was just plain funny, but the joke would get old day after day.  And I don't like the Americana or country kitchen or shabby chic color schemes.  Nothing against those decorating schemes, just not my personal taste.  So, none were strong favorites.  Thus, I had to come up with my own.

As I said, I took one of the painted coasters to use as the base for my magnet.  I used two different fonts of sticker letters from my scrapbooking stash.  The magnets were sorta from my stash too - I'd been keeping those free business card magnets that come with the newspaper or phonebook or whatever, actually for projects just like this (they're stored in the King Leo Peppermint tin in the picture below).  So, really a nice cheap project too!  Always a plus :)  

magnet parts

Back to the stickers... I used two different white fonts to write out Clean and Dirty.  I chose drastically different fonts, so that it'd be easy to tell at a glance.  Remember, they are upside-down to each other, so that the magnet can rotate and still be legible.

I wanted to keep it all black and white, so the last decorations were simply a few white swirls.  The swirls were made by using a nail polish pen, the type used for French manicures and decorative manicures.  I used the polish pen, as I didn't have other white paint, and it was both opaque and easy to draw with.  You can use whatever you want to decorate, obviously. .

Everything was decoupaged in place, and then a few coats of Mod Podge over the top too, to make sure the stickers will stay very put.  The front was finished with a few coats of clear spray paint, for the moisture resistance.

The magnets were glued to the back with Superglue.  The hot glue didn't take as well to the covering on the magnet business cards, too shiny I guess, but the Superglue did the trick.  Make sure you attach enough magnets to keep the coaster up; if your coaster's a heavier one, you might need more magnetic material on the back to keep it from sliding off your washer.

Ta-da!  All done!

2011-09-18_21-15-17_133

And here it is in use!

clean/dirty

Tuesday, February 19, 2013

Another Downton-related post!

And yes, this is the weakest of connections, but I still wanted to include it.  I had fun playing with some new knitting accessories recently, and since I used them for the first time on the Downton KAL, I feel that I can include it all together.  Besides, it's my blog.  I'll post what I want :)

First up, some new stitch markers.  One set of lobster claw ones (the watermelons) and one set of beaded drops (the purple and orange - surprisingly cute $1 beads from Wal-Mart!).  Nothing much more to say, really.  I just wanted to show them off  :)

watermelon markers  purple & orange stitchmarkers

The other new stitch markers are simple rings.  I found a bag of assorted colored jump rings at a big box-type craft store (Michael's or Hobby Lobby, can't remember which).  Too much fun to pass up.  So, using simple silver beads (most of them are spacer beads), I made a sizable number of simple larger stitch markers.  Just opened the rings and added the silver accent over the opening. They are light and pretty snagless, both very important when working with any knitting, but especially when using the larger needles that these fit.  You definitely want lightweight stitch markers on projects like that!  And c'mon - hot pink!

ringmarkers  ringmarkers

The last new accessory is a new knitting bag set.  These are clearance too, for a bonus. I got the idea during the yarn crawl back in October.  I noticed a lot of very cute small project bags, and started making mental notes.  I didn't want to pay $25 for a basic drawstring bag, after all.  One style that I noticed added a grommet hole to their bags, to pass the yarn through.  YarnPop is the brand I saw, but upon looking for their website, I also found other brands and etsy sellers who used the same idea.  You pass the yarn through the opening, so that the skein stays in the bag, nice and clean, while you work on the project outside of the bag.  Helps keep the yarn clean, the skein from unraveling like crazy all over the place, and other nice perks.  I really liked the idea, but as I mentioned, paying $20 and up for a drawstring bag with a grommet just seemed excessive.

I had leftover grommets from adding one to my wallet (where I clip my carabiner with my keys).  Those grommets come in large packs, lemme tell you!  I needed one for my wallet, but they come in packs of about a dozen!  So, I had plenty to experiment with in creating a project bag.  All I needed was the cute bag! 

I found the bag I liked at Old Navy.  A clearance lunch bag, as a matter of fact.  $2.50!  So much easier on the wallet than $25.  Yes, it is a Velcro closure, but it's easy to feed the yarn through so that the Velcro won't catch.  And as a special plus?  There was a pencil case in matching material!  Can we say notions pouch?

my own knitting set, supplies

To make my lunch bag into a project pouch, I added two grommet holes near the top, between the Velcro squares. The yarn can be fed through very easily, and if the grommets are installed properly (follow the directions on the package!), then the holes are pretty snag-free.  When you load everything back into bag, the flap of the lunch bag protects the yarn coming from the grommet and passing back into the bag.  Ta-da -  everything stays nice and neat!

grommets in new bag

So, there you go! A very simple alternative to fancy-shmancy store-bought bags.  To summarize:
  1. Find a bag you like.
  2. Purchase a set of grommets (or use some from your craft stash).  You can find these at most big-box craft or sewing stores.
  3. Mark where you want your yarn holes to be.  You don't want them too close to any Velcro or zippers on the bag, to cut down on any snagging.  Also, it's nice to have the yarn protected when you're not using it, there there are any flaps to take advantage of.
  4. Cut the bag at the marks, if necessary, to start the hole.  You probably will, if there's much thickness to the material - the grommets just don't punch through thick materials.
  5. Follow the directions to install the grommets.  Hammer, hard surface, etc.  Nothing too complicated.
  6. Enjoy!

Downton Abbey Mystery KAL

This project was from a knit-along (KAL) centered around the airing of Downton Abbey series 3.

Downton Abbey Mystery KAL - Lorna's Laces

The yarn:
Lion Brand Magic Stripes.  This is now a discontinued yarn, in case you're wondering.  The first sock yarn LB manufactured during my knitting career (i.e. since 2000).  It was sitting in my stash waiting for a project, and the yardage and gauge worked perfectly for this one.  The colorway is Regatta Blue Stripe, a medium blue (Wedgewood-ish) with repeating stripes of tan, light green, light blue, and white.  It's probably a bit stripey for this project, kinda overwhelming the rosebud lace on the sleeve, but that didn't bother me at all.  Standard sock yarn, superwash wool and nylon.  It was a little splitty to work with, but nothing unusual or too much of a pain.  And once it was washed and blocked, it softened up beautifully.

LB Magic Stripes

The pattern:
Jimmy Beans Wool hosted a mystery KAL, releasing a clue each week that series 3 was running.  It was all posted on the blog, with a new clue each week.  They are planning to release it as compiled pattern once the KAL is all done.

The pattern itself is a pair of long fingerless mitts, "Lady Violet's Dinner Gauntlets."  They are lacy fingerless gloves that extend up the arm almost to the elbow, so yes, the 'gauntlet' term is justified.  There are eyelets included for lacing, so they can be gathered and scrunched if you want to wear them shorter.

Downton mitts - rosebud lace - Clue 1  Downton mitts - thumb - Clue 2

I liked the pattern.  The rosebud lace was a pretty easy lace pattern to read and remember.  The second glove went very quickly as a result - a little over a weekend, start to finish for the 2nd glove (maybe 4 days?).  The postings covered the first glove in clues 1-4 (clue 5 too, sorta, which covered the finishing and the lacing, which is I-cord in the original pattern).  So really, once you've finished the first glove, you can go ahead and reverse everything to mirror image and make the second without waiting for the rest of the clues.

Downton mitts - fingers - Clue 3  Downton mitts - cuff - Clue 4

I guess my biggest frustration was having it broken into clues in the first place!  Kinda silly, when I knew in advance that the pattern would be formatted like this.  But there you go - the whole Having To Wait thing!  Also, I like charts with my lace patterns (and cables, but no cabling in this project).  I know some find the charts hard to read, but with my backwards leftiness, charts are easier for me than written instructions.  Increases and decreases for me are reversed (mine lean left instead of right, or vice versa), so with charts I can simply "make it look like the picture."  With written instructions, I have to do a little more thinking to make sure I'm reversing everything properly.  I know that a chart wouldn't have really worked with a pattern released like this, giving away too much at once, but for personal preference, I would have liked it.  Maybe they'll add in charts when they release the pattern as a whole.  We'll see!

Downton Mitts

Raveled here.

Any changes or modifications?
  • I made a smaller arm than the pattern called for.  The pattern as written yields a 7.75inch 'sleeve' to fit arms 9-9.5 inches around.  My arm is only about 8 inches, so the pattern would've definitely been too big for my tastes.  To yield a smaller project, I used US2 needles, instead of US3 (gave me 28st = 4inch).  I also only cast on 49 stitches.  Yes, this meant on I was on teeny little needles that I felt would snap at any moment.  But, it meant I had to consciously hold my hands loosely, and it gave me a snugger gauntlet sleeve, much more to my taste.
  • I didn't make i-cord for the lacings.  I just don't like the look of that.  So, I used white ribbon, and laced my eyelets up decoratively with that instead.
Downton Mitts

Last thoughts:

I enjoyed this.  I can always use more fingerless mitts, when my workplace is so cold.  My hands are always freezing at my desk at work!

Saturday, February 16, 2013

A Test Knit for NaKniSweMo

Yes, yes, November is NaKniSweMo (National Knit a Sweater in a Month).  But as we know, I'm still playing catchup with some of my project reporting.  At any rate, this sweater was knit in November, even if I'm writing about it in February.  It was a test knit that corresponded perfectly to NaKniSweMo.   Perfect timing!  Ta-da:  motivation!  I was definitely going to finish NaKniSweMo this time!

NaKniSweMo 2012  NaKniSweMo 2012-v2

 My project is raveled here.  And yes, it was a test knit, so this is a photo-heavy post.  I always try to take lots of notes and lots of pictures on test knits, hoping to be as helpful as possible to the designer and to anyone working on the pattern later.

finished Thekla cardigan

The Yarn:
 Jaeger Matchmaker Merino DK.  It's a discontinued yarn, or else I'd have linked to the yarn company webpage.  If you're looking for something similar, Jimmy Beans Wool has a search for comparable yarns.  I liked it.  One of those yarns that you wonder "why on earth did they discontinue it?" but there are lots of those about.  It's a little scratchy, but not irritatingly so, and my skin's pretty sensitive.  It's wool, so one does expect a little bit of that texture.  This just isn't an 'extra fine' merino.  I had a whole bag of it from a lot sale I'd stumbled on a few years ago.  One of those cases of 'love the yarn; love the color; love the sale price; the project will come to me.'  Well, a project came to me!

Jaeger Matchmaker DK  Jaeger Matchmaker DK

The Pattern:
The Thekla Cardigan is available for sale online through Ravelry.  According to the description on it's Ravelry page:
The Thekla Cardigan is a top-down seamless construction, that can be tried on for fit as you go. The cardigan is quite stretchy and therefore designed with negative ease. It features 3/4 length sleeves. The button band and buttonhole band are knit after finishing the body and sleeves by picking up stitches from the side seams.
I like that it's a lighter weight yarn, and with negative ease.  Makes it a little more form-fitting and thus a little less casual than some of my other cardigans.  And the button band gives you a chance to showcase some fun buttons if you want :)  I found some nice patterned brass ones that look very pretty with the burgundy.

You can see the 2 stitch patterns in the picture below.  The ribbing makes it a very stretchy fabric, so it can be quite clingy. 

Thekla cardigan - into the ribbing

In addition to the ribbing, the waist shaping brings it  Not a boxy sweater at all!

Thekla waist shaping in progress  Thekla Cardigan waist shaping

Notes, Alterations or Adjustments:
  • I used US3 needles to reach gauge.  This gave me the proper stitch count, but made my rows a little short.  
  • I couldn't find 1" buttons (either 7/8" or 1 1/8" buttons) so between the shorter rows and the bigger buttons, my front panels are 9 garter ridges (17 rows, plus bind off), instead of 9 rows. I needed the wider button bands to support the larger buttons.
Buttons on Thekla Cardigan
  • Also with the wider front panels, I put in 2 rows of crochet chain stitch, instead of only one.  The big buttons needed the extra support, and I hate it when shirts and cardigans pucker at the front.
  • One final note about the button bands.  The pattern shows a contrasting yarn used as the button bands. I just used the same burgundy.  (a) I like it, (b) I have lots of it, and (c) I didn't have any yarn that contrasted well with the burgundy.
  • I made the body about an inch or so longer. This makes the hemline hit my hips at a much more comfortable point for me, less riding up. 
Thekla Cardigan
  • I added a few extra stitches in the bust.  I didn't want things pulling too much.  Still not enough to be up to the next size, but just a little bit more room to stretch.  The stitches were then decreased as I started the ribbing in about the same spacing as the later decreases at the waist.  Not very noticeable at all in the finished project.  The nice thing about top-down sweaters - very easy to customize for the top-heavy builds!  
  • I made the sleeves slightly shorter. My arms are on the shorter side, and the sleeve length as given was not comfortable for me. I always end up pushing 3/4 sleeves up to my elbows anyway.  So, once I saw where the sleeves would reach on me, I tinked back and stopped the sleeves right over the elbow instead. Still followed the cuff directions, only a little sooner. I think I'm actually going to change the sleeves yet again, though.  With it being a wool sweater, and living in Texas and all, it's a pretty warm sweater.  The elbow-length sleeves aren't warm enough for a sweater body that's as warm as this one - does that make sense?  Instead, I think I'm going to extend the sleeves down to be full-length sleeves.
Thekla Cardigan

Overall:
I definitely like this pattern. It's nice and form-fitting, so less of a boxy, casual, bumming around type sweater.  And as I grow up, I need those in my wardrobe too.  It's an easy pattern to get into one's hands, so it goes pretty quickly.  I did knit the whole thing in about a month, after all.  So... comfy, cute, quick knit (as sweaters go) - what's not to like?  :)

DSC00223

And of course, a required kitty picture.  I think every craft project I've made since we got him (certainly every knitting project) has Scruffy investigating/approving/sitting on whatever it is I'm trying to photograph!  And as his face says "Yeah? So? I'm the kitty!"

My knitting inspector

Sunday, February 10, 2013

Another necklace post

Not Pinterest ideas this time, just from a flyer in Hobby Lobby, actually.  They've got all the colored chains and findings, like the mottled black chain I showed in a necklace last week.  This time, I was playing with some bright teal chain and some black and white chain as my focuses, and these are the necklaces I ended up with.  First, though, here's the inspiration flyer, if you've got a Hobby Lobby near you and are curious.

black & teal necklace inspiration flyer

The first one is using the black and white chain. 

black & white chain necklace

You can see the accent a little more clearly in this picture.  The small black beads are actually beaded headpins (the bead is part of the pin itself).  The red beads, both sizes, were all on a string from Wal-Mart's craft section.

black & white chain necklace

The other one is based off one of the ones on the cover of the flyer.  I really liked the teal chain (and I've got cute flats that match!) and it just seems so much brighter with the black chain and accents than used on its own.  I added a third strand in the necklace, as I had the chain to use.  I don't wear bracelets enough to need to save it for a matching bracelet, so would rather use the chain here.

black & teal necklace

The black beads are flanked (for lack of a better term) by small teal beads I had in my stash.  The black beads, chain, pins and clasp were all in my stash too.


black & teal necklace 

So, there you go.  Nothing crazy, extraordinary about either of them, other than that I think they're pretty and wanted to share :)

Saturday, February 9, 2013

One last race post!

As I'm having a morning of typing up 'End of 2012 Race Results, Notes, and Thoughts' sort of posts, there's one more race to share.  This one was a 5K, another free one on post.  There's one about once a month, and we try to get to the ones we can.  Again, yay for MWR!

This one was the Holiday Dash, or some similar name, held the week after the Jingle Bun Run.  It was the last MWR race for 2012.  Pretty nice way to end the year's race season too.  Not quite as perfect running weather as the week before, but still pretty nice.  They raced the course in the opposite direction from usual, which I wasn't as fond of.  The 5Ks on post typically run the same route, so I guess they were trying to mix things up.  But it meant that the race started with a steeper uphill, instead of finishing with a nice coast downhill.  Not as much fun for me, I'll admit - I'm a little flat-lander coastal type.  I like my flat races :)  With my legs still tired from the week before, it wasn't my best time, but it was still a respectable run, and I had fun.

We did dress up for the race, which contributed a lot to the fun.  Zach was still getting over a running injury, and I'd had the big race the week before, so we both figured we'd go out and just have a good time, not worry about speed so much.  Zach pulled out his Santa suit from the Great Santa Run a few years ago, and I was an elf to accompany.  You can't tell from the picture so much, but my hat has elf ears on the sides!  And of course, the stripey knee-highs again.  Turning into good luck running socks, I think!  I also carried jingle bells too (you can see them in my hand).  Zach laughed that carrying the bells helped him keep an eye (ear?) on my pace - if the bells were nice jingling nice and steady, I was truckin' right along.  The more tired I got, the bells bounced and jingled a little more erratically :)

 mwr holidy dash 5k 2012

Wearing costumes ourselves definitely made me notice was the lack of Silly Holiday Spirit in the runners!!  I don't know if it's TX or this area or this post, but we were the only ones really dressed up!  There were a few sporting Santa hats and one or two reindeer antlers, and one other elf, and that was it!  Maybe it's coming from bigger running areas than where we are now, but the holiday runs always included a bunch of costumed runners in attendance.  I remember one runner decked out as a Christmas tree - green sweatshirt with tinsel and ornaments, and a headband tree topper!  Lots of kids at this run (I think it was part of a school PE program?) so they had some Santa hats, but very few of the adults.  Humbugs! 

So, of course, being two of the few festive runners, as well as the only Santa in the bunch, we got noticed!  They had us come to the front to start the race with all the kids, and we had lots of Ho Ho Ho-ing to do as we ran along, but it was fun.  And of course a lot of jokes about where did Santa's belly go ("This is what running'll do for you, kids!")  The best reaction to Zach's suit was as we were cutting through the gym after the race to get back to the parking lot.  We passed a family with a few little boys, and the smallest (about 6 years old?) just looked up at Zach with these ENORMOUS brown eyes.  "WOW!  Santa's at the basketball court!" - you could just read it in his face.  So cute!!  Zach bent down and talked to him a moment, and chuckled with the little guy's dad.  Priceless face, though, lemme tell you!

And the press was out there!  Besides starting the race, our holiday garb got us interviewed!  It was the last race of 2012, so the post paper's sports columnist came out to write it up.  He came up to us at the end and interviewed us as we were enjoying our post-race bananas and cheering for the other finishers.  And yes, we did make it into the paper!  Not the front page of the sports section, but one of the articles with a front page leader.  In the picture they printed, you can see Zach's Santa very easily over the kids in the picture, but my striped elf hat and socks are a little harder to catch.  But we're there!

Race Preps

Following on yesterday's post...

As I was preparing for this race, I was thinking about times and paces and all  At several of my previous races, I've used one of those pace bands - the wrist band with times marked on it for mile splits so you can keep track of your pace for your goal time.  Usually they are free at the race expos for the bigger races (Clif bars is one vendor which usually has them).  Well, with the race in Temple being a little local thing, no expo, no pace bands.  I've always used the mental math to help the miles pass in these races.  Some people sing, others chatter, I calculate pace and time left and what I need to maintain and so on (yes, I am that dorky).  So I like the pace bands to give me a starting point to play with. 

Enter the magic of the Internet!  

A quick search reveals lots of sites to find free printable bands.  Enter your goal time, the miles (or km if you prefer) are calculated.  Print it up, cover with clear tape (or something similar) and there you go!  

However, there are LOTS of sites out there.  A simple Google search will turn up waaay more than you'd imagine.  Some are good, some too complex to be user-friendly, some prone (unfortunately) to being virus-infected.  And all are a little different in the format and what they offer.  I'm compiling my list here to tag some of my favorite ones.  I'd suggest looking at all of them and seeing which format works for you.  Things like font, font size, spacing, and other layout-type details are really more personal preference.  Gotta play around with them and see what you like, y'know?
  • Pace Tag- from the Ottawa runners' web page.  Formatted as a small enough pace chart to attach to your watch, instead of a full band.  Lets you include pacing for walking breaks too, which is nice.
  • Lucozade - a nice and simple format.  Produces your band as a pdf, so you can save it; that's pretty unique, when most of the other bands were web-based.  Useful, too, if you typically have the same goal time (just need to save it once, then can print it up again as needed).  Also includes a handful of free training plans.  Site does give you a warning about cookies used by the site.
  • mymarathonpace.com - very customizable, including adjusting your pace (slow start, fast finish, etc).  Handy if your race has hills, or something else that might affect pacing.  On the other hand, that can become more complex than one might need.  Also prints in a format where you see both the elapsed time and the pace for each mile.  Will be very useful for those VERY large races where the early miles are too crowded to really get up to speed, and I'll need to adjust my pace accordingly.
  • RunTex - another very simple format.  And hey, some Texas representation on the list too, I guess?  :)
  • Runners' World - yes, this is the UK site.  I haven't found the same thing on the US site, but other than automatically coming up in km not miles, it is pretty easy to navigate :)
  • The Seattle Marathon - yup, the race webpage itself has one.  Very basic, only half or full marathons (some of these other sites offer 5ks and other distances too).  Still, nice and clean and easy.
  • Marathon Guide - automatically comes up with the marathon distance (not surprising, considering the source) but also lets you enter individual distances, so you can make a band for a 10 mile or 30 mile race, or whatever distance you need.
And then, if you're looking for something different and don't mind spending a little, there are temporary tattoos!  PaceTat is the main site for those.  They come at a marathon distance, and then you can trim it down to the distance you need.  I haven't tried these personally, but they're reported to be very durable.

Silly thing is, I didn't use one on this last race, and (as I mentioned yesterday) I still PRed.  I would still prefer to run with a band, and I don't think this was one of those "stop worrying about dropping time and then you will relax and thus drop time" cases. I didn't make a race band this time because I was seriously unsure of what I would be aiming for time-wise!  Hadn't done many long runs, so really didn't know what pace would be comfortable or how out of shape I truly was.  Hard to plan a goal time that way.  Next time though, will be printing up one of these for myself!

Back in the Saddle

Or at least, back on the road.  Back in December was my first long race in a very long while, the Jingle Bun Run half marathon.  Last time I ran a half marathon was before we moved to Texas, so over a year and a half previously - yikes! And as life settles down, I'm needing my Big Race Motivation again.  This is a local half, so not too expensive.  A good way to get back on the horse, right?

So why am I writing about it now?  Because my race shirt finally came in the mail!

Jingle Bun Run Half Marathon 2012

I had done race day registration, since up until the last I wasn't quite sure that I'd feel up to it.  Texas weather bounces around something crazy, and it tends to make my knee ache.  No need to be running 13 miles when I'm hobbling about.  But, with this being a tiny local race, they had race day registration, so I could make my decision as late as possible.  That also meant that they were out of my size shirt on race day, so mine had to be mailed to me.  But it came!


Mom always laughs that I take wonderful race pictures.  I have to say, mile 11 in a half marathon does seem to work well for me.  Mile 13, a little rougher :)  Still, I could see my time and could see the finish line, so the big grin is very genuine!

 last turn 3  finish line 4

We totally lucked out with the weather for the race, too.  60, overcast, lightly misting at times... perfect for running 2+ hours!  The following week was sunny (and Texas KNOWS sunny) and about 10 degrees warmer.  I definitely don't think I'd have done nearly as well with weather like that!

jingle bell run 2  jingle bell run 1

Another bonus to this race was that the race photos were free!  The photo company took the pictures and then uploaded them to a set on Flickr.  Maybe because it was a relatively small race, or maybe because it was the Christmas season, but the photos weren't barred or blocked or whatever, so any of the runners could download pictures in which they spotted themselves!  Flip side to free pictures meant that you had to look yourself up (they tagged race numbers in the pictures, but didn't match them to names) and they were only at one point on the course, plus start and finish.  But those are VERY small prices to have free race pictures!  Thank you PhotoWolfe!

finish line 2 - wide

And the most exciting thing about this race (and why I'm so excited to have the shirt to wear and brag) is that I dropped TONS of time!  About 9 minutes, in fact!  So, a race that I wasn't sure I'd even feel up to running, was one where I dropped tons of time!!  The course was twice around a loop course.  I had never done a race like that, and was worried that it would make the race seem longer, kinda a "Oh, we're only here" sort of feeling.  I think it went quicker mentally though, because I knew what was coming, knew how much further I needed to go.  Broke a long race into smaller mental pieces, I guess.  So great weather, quick-feeling course... whatever the reason though, I had a great race!

A final silly side note, I did prepare a costume for this race.  I've run short races (5Ks) in costume, but this was the first long race I'd considered it!  Just a small one (see below): bunny ears in a Santa hat, plus a bunny tail!  Being a bunny person, every time I saw "Jingle Bun," I thought "bunnies."  It comes, of course, from the sponsor (Schlotzky's), meaning sandwich buns!  Anyway, I figured I'd be a Jingle Bun!  Just cut slits in a cheap Santa hat to feed the ears of a bunny headband through.  I ended up not wearing them, though they were waiting in the car for me.  It was kinda misty and felt almost muggy once we got underway and started warming up, and I didn't want a bedraggled bunny tail.  Still wore my striped knee socks (toe socks!) though.  :)  Next year I'll be a Jingle Bun, maybe!

for a Jingle Bunny  Jingle Bunny hat

Wednesday, February 6, 2013

Oh How Pinteresting Wednesday: Some Necklaces

Another week, another Wednesday!

how pinteresting

This week is a crafty post, showcasing a couple of necklaces using Pinterest pictures as inspiration.  Only one of the inspiration posts had instructions, mind you, so it's mostly just my takes on the original pieces.

First up, a button choker, from a post in Art Bead Scene.  The original post was about using buttons in one's jewelry projects, so check it out.  There are some fun ideas in there, beyond the Wild Horse Choker that was the inspiration for my necklace (the choker is named for the design on the button, a running horse, in case you're curious).  It's a very simple necklace, just a shank button with leather cording.  I found a large flower button that I liked at Hobby Lobby, so combined with some black leather lacing... Ta-da!   A nice neutral casual choker!

button choker

The hardest part was the knotting, so that it would slide enough to be adjustable but not slide out.  Just took a few tries to get the knot the right tension.  I also chose to omit the decorative bead at the knot.  No particular reason; I simply didn't have a bead that matched the brass/antique gold-ish button well enough :)  Sorry that the picture below is blurry...

button choker

The second piece is based on one in an etsy store, the Moving Waters Necklace by SC Designs Distinctive Artisian Jewelry.  The inspiration piece is all blues and pearls and sterling silver, while mine is more earth-tone jades and black.  Still, the basic idea of the one-sided beading and the beaded drop from a center ring carried through.  I like this one a lot, as those greens and neutrals coordinate with a lot in my closet :)

jade drop necklace  jade drop necklace

This is one of my mid-length necklaces, though the drop does make it a little longer.  Here it is being worn, so you have a sense of scale (Again, sorry it's a little blurry; I'm not great at the self-shots).

jade drop necklace

The last necklace has a pair of inspiration posts.  The first place I saw it was the simple News In Style post.  Yes, there are instructions there, but just the one pictures.  The second place I saw this style necklace was a post at Blue Cricket Design.  I used the instructions at Blue Cricket design a lot more, as they are more detailed and give a lot more helpful advice.  However, I didn't find usable chain at our hardware stores.  The style of chain they had was a different sort of link (or much heavier gauge), and just would not work for this project.  So, instead, I used a colored chain from Hobby Lobby.  The ribbon coordinates with flecks of color on the chain.  A very simple project, and I'm pretty please with the final results, as is Scruffy.

ribbon & chain necklace